Dull tools are more than just an annoyance—they can ruin
projects, increase your risk of injury, and destroy materials. Whether you're a
woodworker, crafter, home cook, gardener, or DIY enthusiast, properly sharpened
tools make every task easier, more precise, and more enjoyable.
Many people replace their tools when they become dull, not
realizing that with a few simple techniques, they can restore factory-sharp
edges and extend the life of their equipment for years. Even expensive,
high-quality tools eventually lose their edge with use, but that doesn't mean
they need to be replaced.
In this guide, I'll share professional sharpening techniques
that I've refined throughout my decades-long work with tools. As
someone who has maintained a wide range of tools, from precision woodcarving
chisels to kitchen knives, haircutting scissors to garden tools, I've learned
that proper tool maintenance is both an art and a science. The methods in this
guide apply to virtually all cutting tools you have in your home and
workshop.
By learning these simple sharpening techniques, you'll:
- Save
money by extending the life of your tools
- Improve
the quality of your projects
- Reduce
fatigue and frustration
- Develop
valuable skills that apply to many different tools
- Minimize
waste by keeping perfectly good tools out of landfills
Let's begin by understanding what makes different tools
work—and what happens when they don't.

Before sharpening any tool, it's essential to understand its
cutting-edge design and the materials it's made from. Different tools have
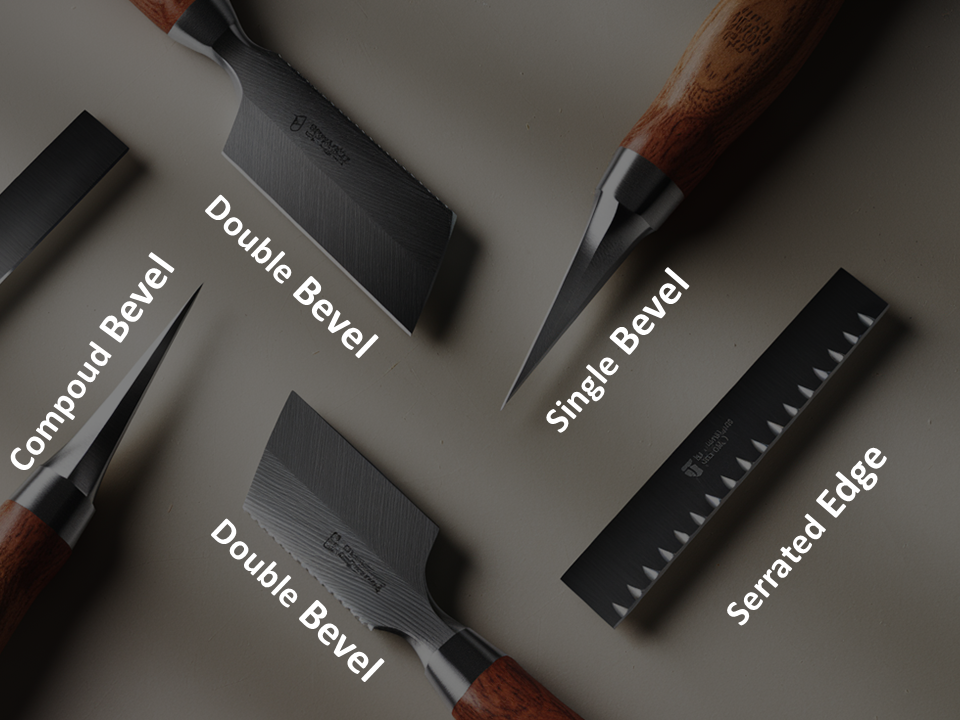
different edge geometries for specific purposes. Common Edge Types include Single Bevel, which is found on scissors, most chisels, and
some specialized knives. The edge is ground on only one side, with the other
side remaining flat.
Double Bevel: Most knives and many garden tools feature
bevels on both sides of the blade, resulting in a symmetrical edge.
Compound Bevel: Advanced cutting tools often feature
a primary bevel for strength and a secondary bevel, also known as a microbevel,
for enhanced sharpness.
Serrated Edge: Tools such as bread knives, certain
scissors, and specific garden tools feature tooth-like edges that require
specialized sharpening techniques.
Common Tool Materials
The material your tool is made from determines how it should
be sharpened:
Carbon Steel: A traditional tool material that takes
a keen edge but is prone to rust.
- Sharpens
easily
- Requires
more frequent maintenance
- Common
in high-quality woodworking tools and some kitchen knives
Stainless Steel: More rust-resistant but typically
doesn't hold an edge as well as carbon steel.
- Requires
more effort to sharpen
- Holds
up better in humid environments
- Common
in household scissors and garden tools
High-Speed Steel (HSS): Used in many modern
woodworking tools and drill bits.
- Very
wear-resistant
- Requires
specific sharpening techniques
- Holds
edge longer than carbon steel
Tungsten Carbide: Extremely hard material used for
specialized cutting tools.
- Requires
diamond abrasives for sharpening
- Holds
edge for extended periods
- Found
in premium woodworking tools
Ceramic: Ultra-hard and lightweight material used in
some kitchen and craft knives.
- Requires
diamond abrasives
- Very
brittle
- Extremely
long-lasting edge when properly maintained
Understanding these materials and edge types is
crucial to selecting the right sharpening method. Using the wrong technique can
damage your tools rather than improve them.
Common blade types
Building a versatile sharpening kit allows you to maintain
virtually any tool. Here are the fundamentals:
Abrasives
Whetstones/Water Stones:
- Versatile
option for most tools
- Available
in various grits (coarse to ultra-fine)
- Require
soaking before use (except for some synthetic stones)
- Best
for knives, chisels, plane irons, and scissors
- Recommended:
King 1000/6000 Combination
Stone ($45-60)
Oil Stones: Traditional
option that uses oil as a lubricant
- More
durable than water stones
- Cut
more slowly but last longer
- Good
for beginners as they're more forgiving
- Recommended:
Norton Combination Oil Stone ($30-45)
Diamond Plates: Modern
solution with diamond abrasive on metal plate
- Extremely
durable and maintain flatness
- Work
on all tool materials including carbide
- Higher
initial investment but long-lasting
- Recommended:
DMT Dia-Sharp Set ($120-150)
Sandpaper Systems:
- Economical
starting option
- Versatile
with many available grits
- Requires
flat backing surface (glass or granite)
- Good
for beginners and occasional sharpening
- Recommended:
3M Wetordry Sandpaper Kit ($15-20)
Sharpening Guides and JigsAngle Guides:
- Help
maintain consistent bevel angles
- Simple
plastic or metal guides
- Inexpensive
but effective
- Recommended:
Veritas Angle Guide ($10-15)
Honing Guides:
- Hold
chisels and plane irons at precise angles
- Essential
for woodworking tool maintenance
- Various
styles available for different tools
- Recommended:
Veritas MK II Honing Guide ($70-90)
Scissor Sharpening Jigs:
- Specialized
guides for maintaining proper scissor angles
- Helps
prevent damage to scissors
- Recommended:
Professional Scissor Sharpening
Kit ($35-50)
Finishing and Testing Tools
Leather Strop:
- Essential
for final polishing and maintenance
- Creates
razor-sharp edges
- Used
with polishing compound
- Recommended:
Flexcut Leather Strop ($20-30)
Magnifiers:
- For
inspecting edges and identifying problems
- Helps
assess sharpening progress
- Recommended:
10x Loupe with LED ($15-25)
Testing Materials:
- Paper
for testing knives and scissors
- Wood
scraps for testing woodworking tools
- Hair
or synthetic alternatives for clipper blades
Starting Recommendation: If you're new to sharpening,
begin with:
1. A
combination water stone (1000/6000 grit)
2. Basic
angle guide
3. Leather
strop and compound
4. Small
magnifier
This basic setup handles most household and workshop tools
effectively while building your skills.
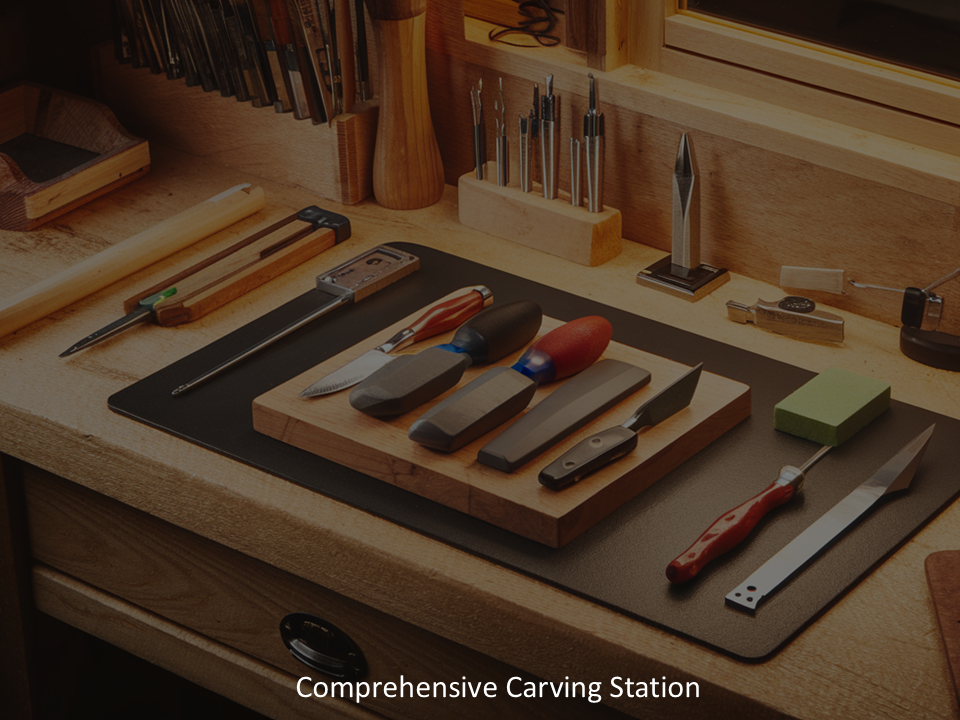
Comprehensive Carving Station
Proper preparation ensures both your safety and successful
sharpening results.
Safety First Sharpening involves working closely with cutting edges, so
safety is paramount:
- Wear
eye protection when using power sharpening equipment
- Use
cut-resistant gloves on your non-dominant hand
- Secure
your work area to prevent slipping or shifting during sharpening
- Never
test sharpness by running your finger along the blade
- Maintain
proper lighting to clearly see your work
- Keep
a first aid kit nearby just in case
Workspace Setup
An effective sharpening station includes:
- Stable
work surface at a comfortable height
- Good
lighting (preferably natural light plus task lighting)
- Non-slip
mats or holders for stones
- Clean
water source (for water stones)
- Clean,
oil-free area (oils from other projects can contaminate stones)
Tool Assessment and Cleaning
Before sharpening, always:
1. Assess
Current Condition:
- Examine
for nicks, chips, or damaged sections
- Check
for rust or corrosion
- Identify
any bends or alignment issues
- Determine
the current bevel angle if possible
2. Clean
Thoroughly:
- Remove
all dirt, debris, and old lubricants
- Use
appropriate solvents for adhesive residue
- Remove
surface rust with fine steel wool (#0000)
- Ensure
pivot points (for scissors/shears) move freely
3. Documentation
(Optional but Helpful):
- Take
before photos for comparison
- Note
current performance issues
- Measure
current angles for reference
Expert Tip:Clean your sharpening stones before
and after use. Contamination from previous sharpening sessions can affect
results. Use a nagura stone or stone fixer to prepare the surface for water stones.
Safe sharpening setup: organized workspace, proper lighting, and protective gear.
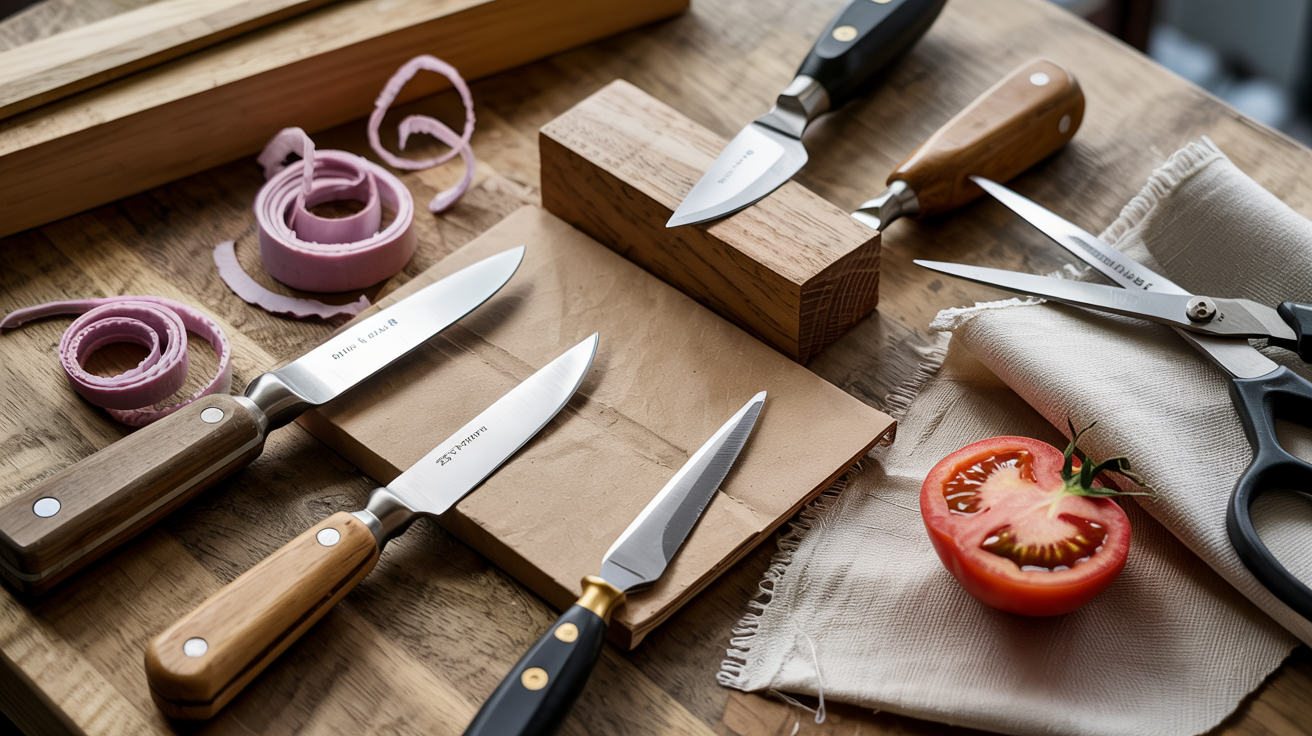
Scissors and shears are the most commonly used cutting
tools that benefit from regular sharpening. Their unique pivot design requires
specific techniques.
Types of Scissors and Their Differences
Different scissors are designed for specific purposes, which
affects how they should be sharpened.
Household Scissors: General-purpose with symmetrical
handles and medium-weight blades. Typically beveled on the outside edge.
Fabric Scissors: Feature longer blades with a sharper
angle for clean cutting through multiple layers. Often, the bottom blade is slightly
longer.
Hairdressing Shears: Professional models have a
removable tension screw and ergonomic handles. The edges are precisely honed.
Garden Shears: These feature heavier construction and thicker blades for efficient cutting of plant material. They may also have sap grooves
and coated surfaces.
Left-Handed Scissors: The bevels are reversed
compared to right-handed scissors. Identifying this is crucial before
sharpening.
Method 1: Sharpening with Sandpaper
This method provides excellent control and is suitable for
most types of scissors.
Materials Needed:
- Wet/dry
sandpaper (400, 600, and 1200 grit)
- Small
piece of glass or very flat surface
- Water
in a spray bottle
- Clean
cloth
Step-by-Step Process:
1. Prepare
the Sandpaper
- Cut
sheets into quarters
- Place
400-grit on your flat surface
- Spray
lightly with water (wet sanding produces better results)
2. Identify
the Bevel
- Look
at the blades from the end
- In
most right-handed scissors, the bevel is on the outside edge
- This
beveled edge is what you'll sharpen
3. Sharpening
Process
- Disassemble
scissors if possible
- Hold
the blade with the beveled edge down on the sandpaper
- Maintain
the original bevel angle (typically 45-60 degrees)
- Draw
the blade across in one direction, from pivot to tip
- Repeat
10-15 times, keeping the angle consistent
- Progress
through finer grits (600, then 1200)
- Remove
any burr by laying the flat side down and making 1-2 light passes
4. Reassemble
and Test
- Clean
thoroughly
- Apply
a drop of oil to the pivot
- Test cut paper for smooth, clean cutting

Well-maintained scissors cut cleanly and precisely, making your projects more enjoyable.
Method 1: Sharpening with Sandpaper
This method provides excellent control and is suitable for
most types of scissors.
Materials Needed:
- Wet/dry
sandpaper (400, 600, and 1200 grit)
- Small
piece of glass or very flat surface
- Water
in a spray bottle
- Clean
cloth
Step-by-Step Process:
1. Prepare
the Sandpaper
- Cut
sheets into quarters
- Place
400-grit on your flat surface
- Spray
lightly with water (wet sanding produces better results)
2. Identify
the Bevel
- Look
at the blades from the end
- In
most right-handed scissors, the bevel is on the outside edge
- This
beveled edge is what you'll sharpen
3. Sharpening
Process
- Disassemble
scissors if possible
- Hold
the blade with the beveled edge down on the sandpaper
- Maintain
the original bevel angle (typically 45-60 degrees)
- Draw
the blade across in one direction, from pivot to tip
- Repeat
10-15 times, keeping the angle consistent
- Progress
through finer grits (600, then 1,200)
- Remove
any burr by laying the flat side down and making 1-2 light passes
4. Reassemble
and Test
- Clean
thoroughly
- Apply
a drop of oil to the pivot
- Test cut paper for smooth, clean cutting
How to sharpen dulled scissors with sandpaper.
For premium scissors, a sharpening stone provides the finest
edge.
Materials Needed:
- Combination
whetstone (1,000/6,000 grit)
- Stone
holder or non-slip mat
- Water
for stone
- Marker
pen
Step-by-Step Process:
1. Mark
the Bevel
- Use
a marker to color the beveled edge
- This
helps visually confirm you're maintaining the correct angle
2. Stone
Preparation
- Soak
water stone according to manufacturer's instructions
- Place
in holder with 1,000 grit side up
3. Sharpening
Technique
- Place
the beveled edge on the stone at the original angle
- Draw
the blade across the stone in smooth strokes
- Check
progress by seeing if marker is removed evenly
- Once
consistent, move to 6,000 grit side
- Finish
with lighter pressure for polishing
- Remove
any burr with a single light pass of the flat side
4. Testing
and Adjustment
- Clean
thoroughly
- Test
cut paper
- Adjust
tension for optimal performance
Expert Tip:
Scissors' performance depends as much
on proper tension as sharpness. After sharpening, adjust the pivot screw so the blades move smoothly but remain in contact throughout their length. Too tight
causes excessive wear; too loose results in poor cutting.
Adjusting Scissor Tension
For optimal performance after sharpening:
1. Clean
the pivot area thoroughly
2. Apply
a tiny drop of proper lubricant
3. Adjust
the screw in very small increments
4. Test
after each adjustment
5. Perform the "drop test" - hold
scissors vertically, partially open; the bottom blade should stay in position
but slowly close when tapped gently
Maintain the angle on the stone.
Sharp knives are safer and more efficient than dull ones.
The principles remain similar, whether kitchen, pocket, or utility blades.
Understanding Knife Geometry
A knife's cutting edge consists of several important elements. The primary bevel forms the main cutting angle of the knife, while the secondary bevel creates a smaller angle at the very edge for additional sharpness. The total edge angle typically ranges from 15° (common in Japanese kitchen knives) to 25° (found in outdoor/utility knives), determining both the knife's cutting performance and durability.
Water Stone Method (Recommended for Quality Knives)
Materials Needed:
- Whetstones
in progressive grits (1,000, 3,000, 6,000)
- Stone
holder
- Water
- Angle
guide (optional for beginners)
Step-by-Step Process:
1. Stone
Preparation
- Soak
stones according to the manufacturer's instructions
- Place
in holder with coarsest grit up
- Keep
surface wet throughout the process
2. Finding
the Angle
- For
Western kitchen knives: approximately 20°
- For
Japanese knives: approximately 15°
- For
outdoor/utility knives: 22-25°
- Use
angle guide if needed for consistency
3. Sharpening
Technique
- Place
blade edge on stone at proper angle
- Apply
light, even pressure
- Sweep
the entire edge across the stone in a slicing motion
- Maintain
consistent angle throughout the stroke
- Complete
5-10 passes on each side
- Check
for burr formation (a slight ridge on the opposite side)
- Progress
through finer stones, reducing pressure with each stone
- Strop
on leather for final polish
4. Testing
- Paper
slice test: Should cut printer paper cleanly
- Tomato
test: Should slice without pressure
- Arm
hair test (carefully): Should shave hair with light touch
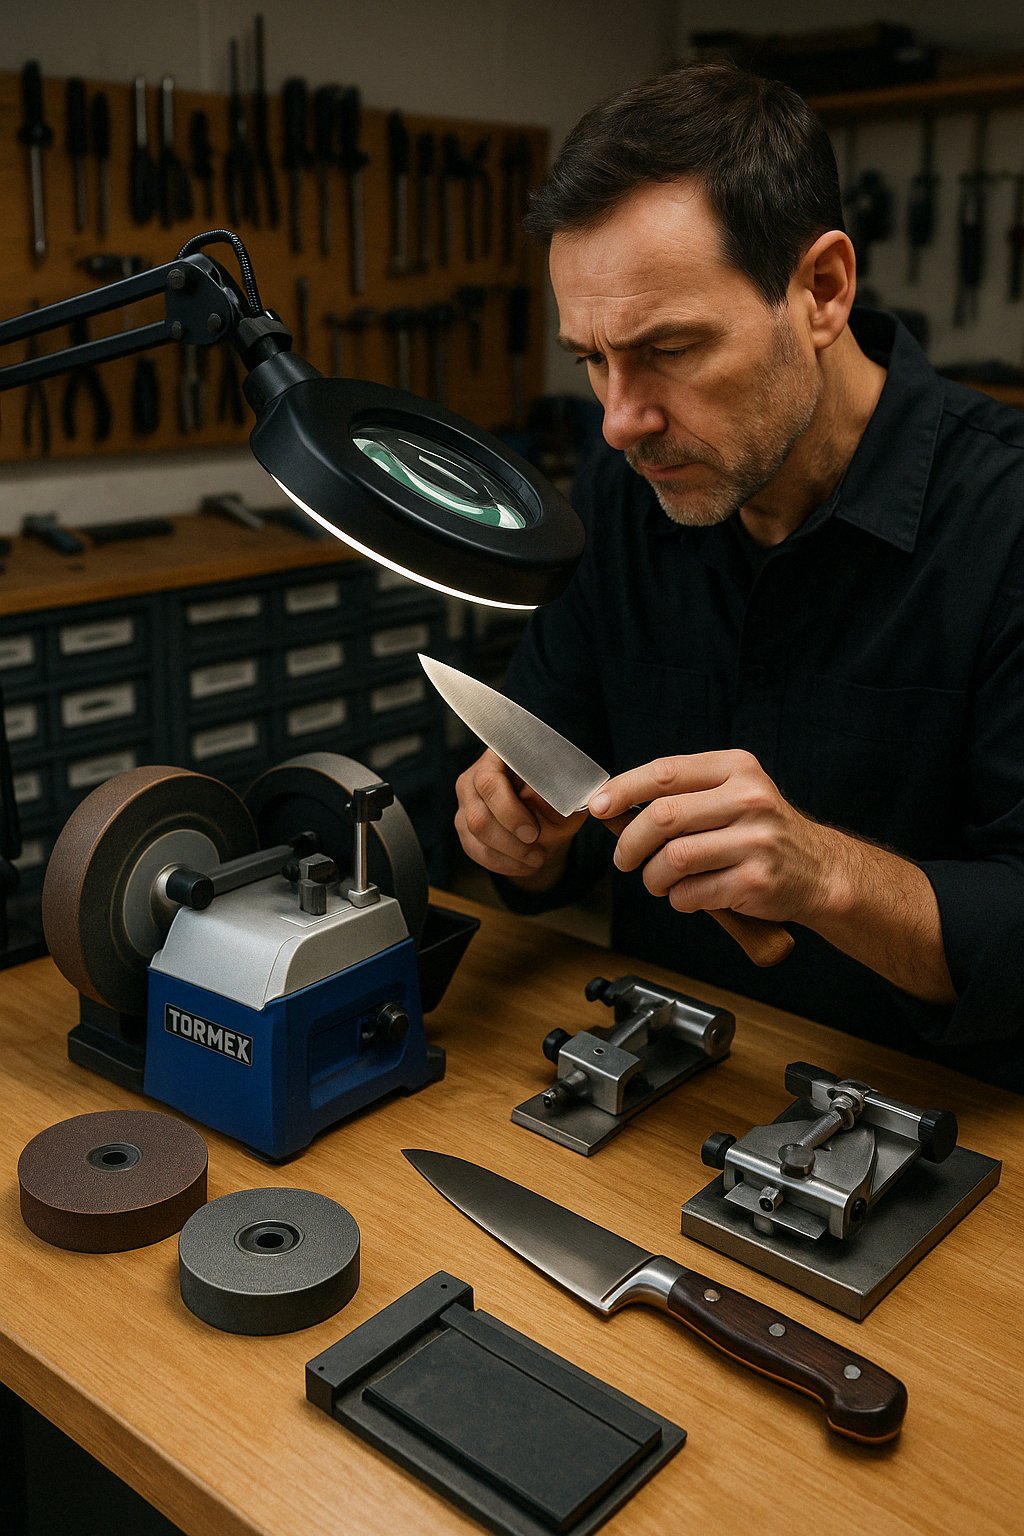
Maintaining a consistent angle (20°) is key to effective knife sharpening on a whetstone.
Guided Systems for Consistent Results
For those concerned about maintaining precise angles, guided
systems are excellent options:
Lansky Controlled-Angle System:
- Uses
guide rods and clamps to maintain exact angles
- Multiple
angle options
- Portable
and affordable
- Recommended:
Lansky Deluxe Sharpening System ($40-50)
Edge Pro Style Systems: Table-mounted
guide systems
- Extremely
precise and consistent
- Excellent
for high-end knives
- Recommended:
Edge Pro Apex Model ($165-200)
Expert Tip: When sharpening curved blades,
maintain contact with the stone while slightly adjusting your angle throughout
the sweep of the blade. The edge should always be tangent to the stone's
surface.
Carving Tools
Carving gouges, V-tools, and specialty carving tools require
special consideration due to their curved edges.
Materials Needed:
- Slipstones
or shaped stones for inside curves
- Conventional
stones for outside bevels
- Leather
strop (preferably with curved edge)
- Polishing
compound
Key Techniques:
Outside
Bevel Sharpening
Use
conventional stones as with chisels
Maintain
consistent angle while rolling the tool
Follow
the curve of the cutting edge
Inside
Curve Sharpening
Use
slipstones shaped to match the inside curve
Remove
any burr formed from outside sharpening
Polish
inside with shaped leather strop
V-Tool
Considerations
Sharpen
each face independently
Ensure
the point is properly shaped and sharp
Test
by carving clean V-grooves in scrap wood
Expert Tip: Create custom strop shapes for your
carving tools by gluing leather to curved wooden forms that match your tool
profiles. This allows you to maintain the perfect edge between more intensive
sharpening.

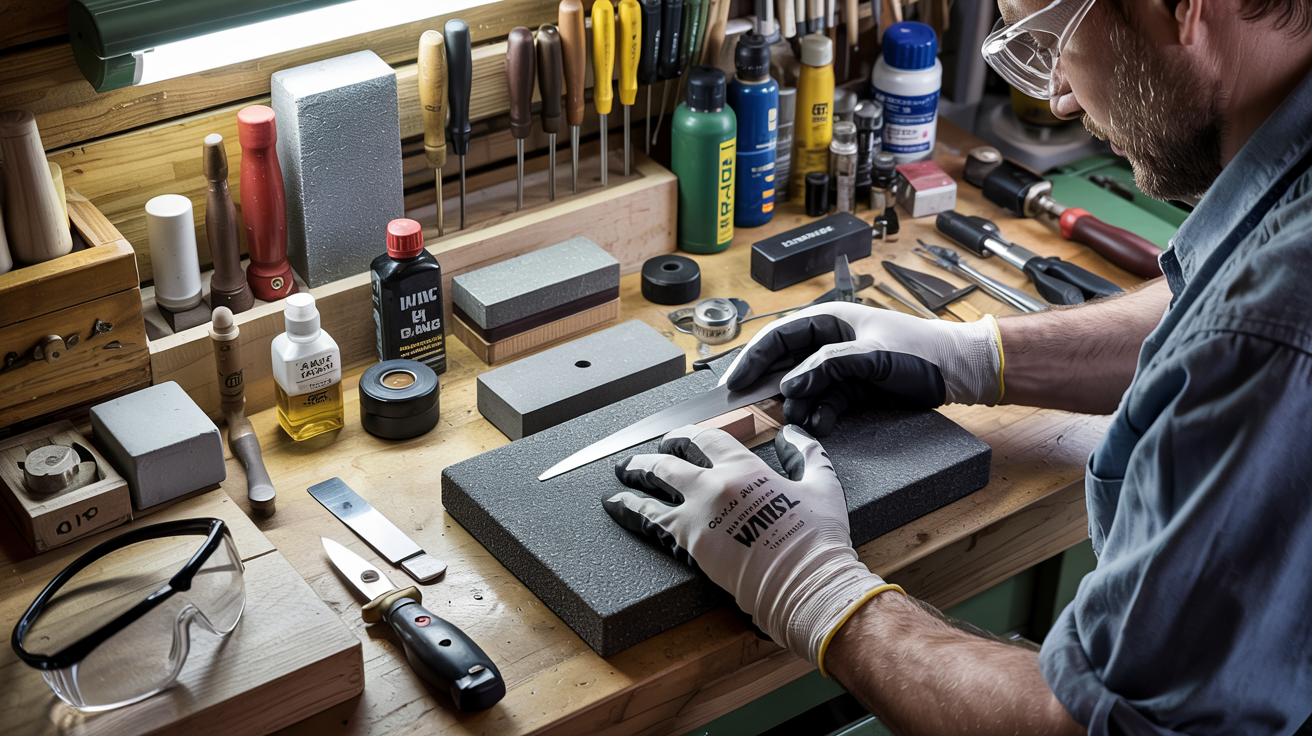
Precision sharpening with a table-mounted guide system for consistent results.
Sharp woodworking tools produce better results, require less effort, and reduce the risk of accidents.
Chisels and Plane Irons
Chisels and plane irons typically have a single bevel and
require a very sharp, durable edge.
Materials Needed:
- Combination
water stones (1000, 4000, 8000 grits)
- Honing
guide
- Flattening
plate or stone
- Leather
strop and compound
Step-by-Step Process:
1. Flatten
the Back First
- The
unbeveled back must be perfectly flat
- Work
progressively through the stones
- Need
only flatten 1" from the cutting edge
- Final
polish should be mirror-like
2. Set
the Bevel Angle
- Typical
angles: 25° for chisels, 30° for plane irons
- Use a honing guide for consistency
- Mark the current bevel with a marker to track progress
3. Primary
Bevel Sharpening
- On 1000-grit
stone, create the primary bevel
- Use
firm pressure and consistent strokes
- Continue
until a burr forms on the back side
- Check
for a consistent bevel across the width
4. Microbevel
Creation (Optional but Recommended)
- Adjust
honing guide for a 2° higher angle
- On
4000-grit stone, create a small secondary bevel
- This
improves edge durability and sharpening efficiency
- Takes
only 5-10 strokes to create
5. Final
Polishing
- On
8000-grit stone, polish the microbevel
- Flip the tool and remove the burr from back
- Strop
both back and bevel for final polish
Testing Chisels and Plane Irons:
Should
pare end grain cleanly without pressure
Should
leave a glassy smooth surface
Edge
should reflect no light (indicates no rounding)
Carving Tools
Carving gouges, V-tools, and specialty carving tools require
special consideration due to their curved edges.
Materials Needed:
- Slipstones
or shaped stones for inside curves
- Conventional
stones for outside bevels
- Leather
strop (preferably with a curved edge)
- Polishing
compound
Key Techniques:
1. Outside
Bevel Sharpening
- Use
conventional stones as with chisels
- Maintain a consistent angle while rolling the tool
- Follow
the curve of the cutting edge
2. Inside
Curve Sharpening
- Use
slipstones shaped to match the inside curve
- Remove
any burr formed from outside, sharpening
- Polish
inside with shaped leather strop
3. V-Tool
Considerations
- Sharpen
each face independently
- Ensure
the point is properly shaped and sharp
- Test
by carving clean V-grooves in scrap wood
Expert Tip: Create custom strop shapes for your
carving tools by gluing leather to curved wooden forms that match your tool
profiles. This allows you to maintain the perfect edge between more intensive
sharpenings.
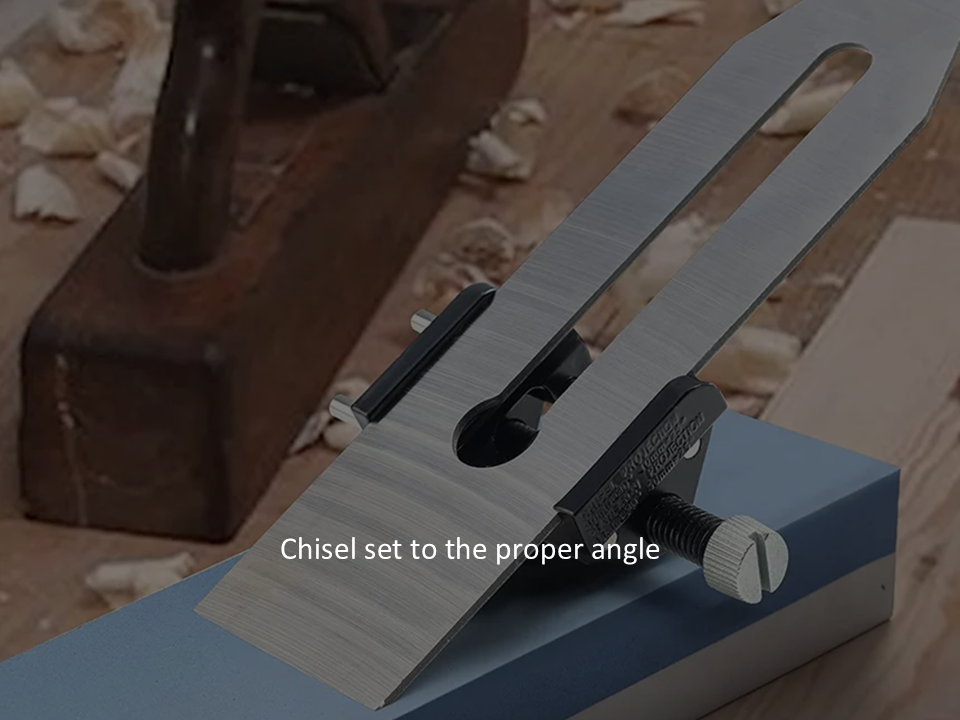
Here, we're using a guide to ensure the proper angle
Professional-grade hair clippers and animal grooming
clippers have precision-ground blades that can be sharpened to extend their
service life. Understanding Clipper Blade Design
Clipper blades consist of two main components:
- Stationary
Blade: The larger, fixed blade with teeth
- Moving
Blade: The smaller oscillating blade that creates the cutting action
Before Sharpening:
- Disassemble
and thoroughly clean blades
- Remove
all hair, debris, and old oil
- Inspect
for damaged teeth or excessive wear
Sandpaper Method for Clipper Blades
Materials Needed:
- Wet/dry
sandpaper (400, 600, 1200 grit)
- Flat
glass or metal surface
- Clipper
oil or light machine oil
- Small
brush for cleaning
Step-by-Step Process:
1. Prepare
Surface
- Secure
400-grit wet/dry sandpaper on a flat surface
- Add
a few drops of water (wet sanding is more effective)
2. Sharpen
Moving Blade
- Hold the blade flat against sandpaper
- Move in a figure-eight pattern to ensure even sharpening
- Apply
very light, even pressure
- 10-15
passes are typically sufficient
- Progress
to 600 and 1200 grit
- Clean
thoroughly between grits
3. Sharpen
Stationary Blade
- Focus
only on the flat surface that contacts the moving blade
- Use the same figure-eight motion with light pressure
- Complete the same grit progression
- Be
careful not to round the corners of the teeth
4. Reassembly
- Clean
both blades thoroughly
- Apply
clipper oil to all contact surfaces
- Reassemble
according to the manufacturer's instructions
- Adjust
tension to specifications
5. Testing
and Break-In
- Run
clipper for 15-20 seconds to distribute oil
- Test
on hair or a synthetic alternative
- Cutting
should be smooth and efficient
- Clipper
should run slightly cooler than before sharpening
Expert Tip: Never sharpen the cutting
surfaces/angles of the teeth themselves - focus only on the flat mating
surfaces of the blades. The factory cutting angle is precision-ground, and
attempting to modify it typically ruins the blades.
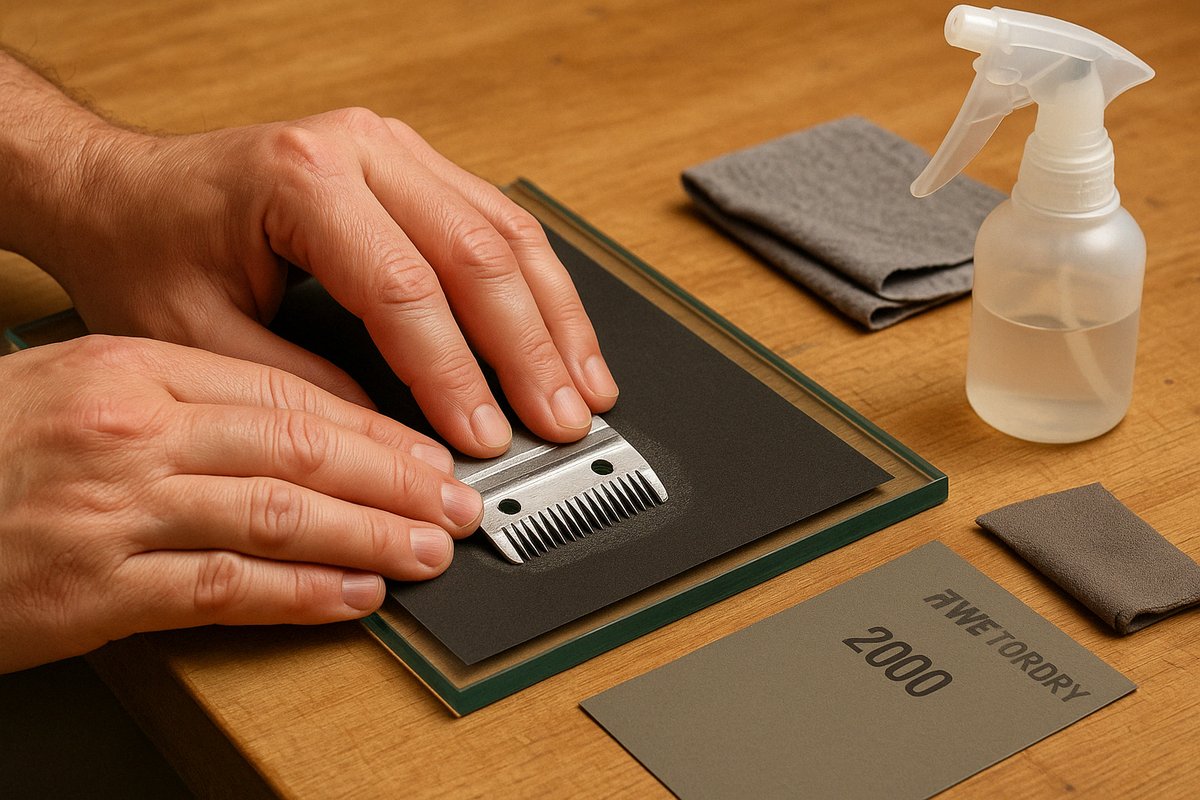
Sharpen a clipper blade using sandpaper using proper technique and pressure.
After sharpening, thorough testing ensures your tools are
performing properly and safely.
Knife Testing Methods
Paper Slice Test:
- Hold a
sheet of printer paper by one edge
- Draw
the blade across the top edge
- A
sharp knife slices cleanly without tearing or catching
Tomato Test:
- Attempt
to slice a ripe tomato
- Should
cut the skin with minimal pressure
- Edge
should not crush or tear the tomato
Arm Hair Test (Use Caution):
- Lightly
draw the blade across your arm hair
- A
properly sharpened knife will shave hair without pressure
- Never
apply pressure during this test
Scissor Performance Tests
Paper Cutting Test:
- Cut
straight lines through standard paper
- Scissors
should cut smoothly without creasing
- The
cut should be clean along the entire blade length
- Try
cutting with just the tips to test the complete edge
Material-Specific Tests:
- Fabric
scissors: Test on light cotton fabric
- Hairdressing
shears: Test on hair or synthetic alternatives
- Kitchen
scissors: Test on appropriate food items
Woodworking Tool Tests
Chisel Test:
- Pare
end grain on softwood
- Should
create thin, continuous shavings
- Surface
should be smooth without tear-out
Plane Iron Test:
- Install the blade in the plane and adjust it properly
- Take
fine shavings on straight-grained wood
- Shavings
should be consistent and whisper-thin
- The resulting surface should require no sanding
Carving Tool Test:
Make
various cuts in appropriate carving wood
Tools
should cut with minimal resistance
Cuts
should be clean without tearing or crushing fibers
Remember: When properly sharpened, tools should cut with minimal effort. If you're forcing the tool, it's either not sharp enough, or using it incorrectly.
Testing sharpness across tools—clean cuts, smooth shavings, and precision results.
Proper maintenance extends the time between sharpening and
prolongs the life of your tools.
Daily Care Routines
Cleaning After Use:
- Wipe
blades clean immediately after use
- Remove
any moisture to prevent rust
- Clear
resins, sap, or adhesives before they harden
Proper Storage:
- Use
blade guards or sheaths when not in use
- Store
in a dry environment with a stable temperature
- Keep
tools separate to prevent edges from contacting each other
- Consider
silica gel packets for humidity control in storage containers
Quick Edge Maintenance:
- Use a
leather strop loaded with compound regularly
- Honing
steel for kitchen knives (maintains rather than sharpens)
- "Touch-up"
techniques appropriate to the tool
Material-Specific Care
Carbon Steel Tools:
- More
susceptible to rust and corrosion
- Apply a light coat of oil for storage
- Consider
specialized tool wax for longer protection
- React
immediately to any rust formation
Stainless Steel Tools:
- Still, require cleaning despite corrosion resistance
Avoid
chlorine exposure, which can pit blades
Clean
thoroughly after saltwater exposure
Coated Blades:
- Some
tools have non-stick or specialized coatings
- Use
nylon brushes rather than metal for cleaning
- Avoid
harsh chemicals that could damage coatings
Environment Considerations
Humidity Control:
- High
humidity accelerates rust formation
- Consider
dehumidifier in workshop areas
- Tool
cabinets with climate control for valuable tools
- Rust
inhibitor products for long-term storage
Temperature Fluctuations:
- Can
cause condensation on metal surfaces
- Allow
cold tools to warm to room temperature before opening storage containers
- Consider
insulated storage for temperature stability
Expert Tip: Create a regular maintenance schedule
rather than waiting for tools to develop problems. Just 5 minutes of cleaning
and stropping after each use prevents hours of restoration work later.
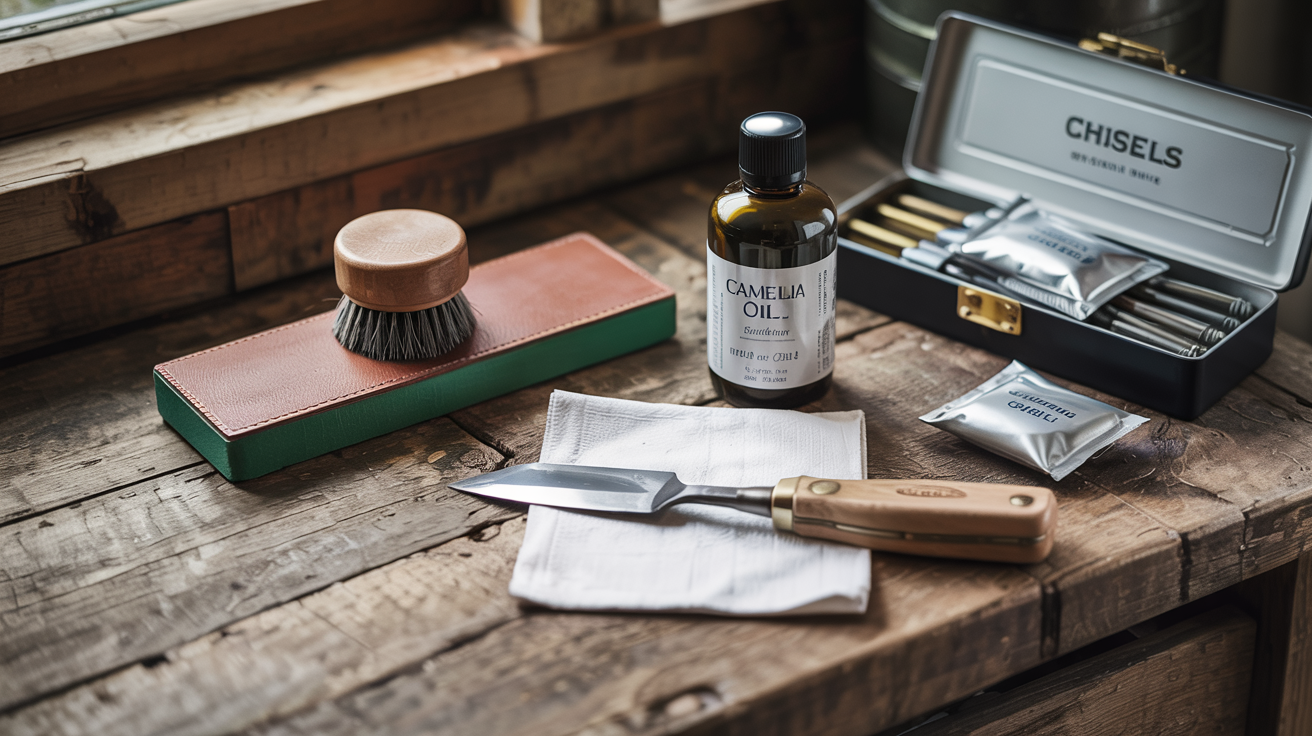
Routine maintenance tools for protecting and preserving sharp edges.
Some tools require specific approaches due to their unique
design or materials.
Garden Tools
Pruning Shears:
- Disassemble
when possible
- Maintain
factory angles (typically 45-60°)
- Address
both blade and anvil surfaces
- Apply
food-safe lubricant for plant safety
Hedge Shears:
- Long
blades require careful alignment
- Use
extended sharpening stone or file for efficiency
- Focus
on maintaining a consistent angle along the length
- Test
for proper tension after reassembly
Lawnmower Blades:
- Remove
from mower for sharpening
- Maintain
original angle (usually 30°)
- Ensure
equal material removal to maintain balance
- Check
for straightness and balance before reinstalling
Woodworking Specialty Tools
Router Bits:
- Typically
require diamond sharpening tools
- Focus
only on the flat face, never the profile
- Light
honing of cutting edges only
- Professional
sharpening is recommended for complex profiles
Lathe Tools:
- Different
angles for different applications
- Use
specialized fixtures for consistent results
- It is critical to maintaining proper relief angles
Bandsaw Blades:
- Specialized
equipment typically required
- Focus
on side clearance and tooth set
- Professional
services are usually more economical
Kitchen Specialty Items
Serrated Knives:
- Use
tapered diamond rod for individual serrations
- Work
each gullet individually
- Maintain
original serration depth and angle
- Remove
any burrs from the flat side
Meat Grinder Blades:
- Require
perfectly flat sharpening surface
- Work
in circular motion to ensure evenness
- Must
maintain a 90° angle on cutting edges
- Both
blade and plate require maintenance
Expert Tip: For highly specialized or expensive
tools, consider investing in manufacturer maintenance kits designed
specifically for that tool. The added cost is justified by longer tool life and
better performance.
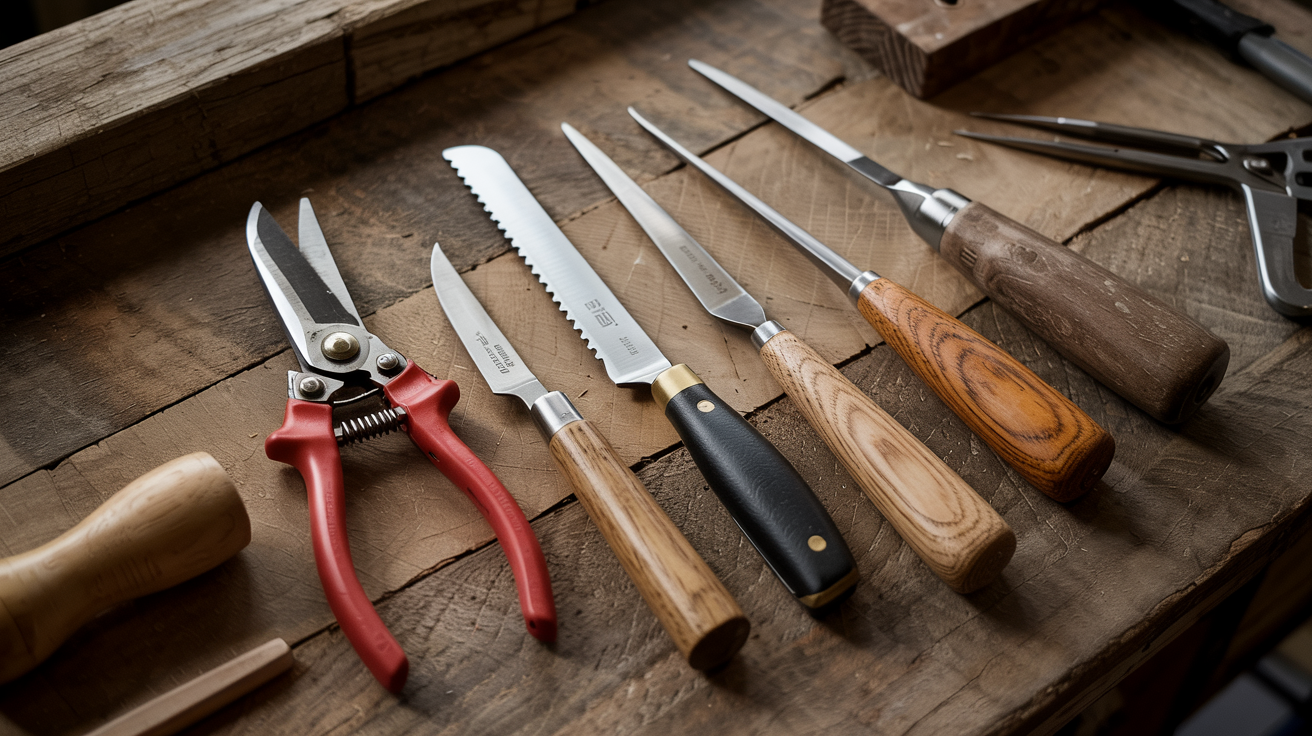
Specialty tools—from carving gouges to garden shears—each with unique sharpening needs.
Even with proper technique, you may encounter challenges.
Here's how to address common problems:
Edge Won't Get Sharp
Possible Causes:
- Insufficient
grinding at coarse grit
- Inconsistent
angle during sharpening
- Not
developing proper burr
- Material
limitations
Solutions:
- Return
to coarsest stone/paper
- Ensure
you're reaching the edge (marker test helps verify)
- Maintain
consistent angle using guides if necessary
- Verify
proper burr formation before progressing to finer grits
Edge Dulls Too Quickly
Possible Causes:
- The final edge is too refined for the application
- Improper
edge angle for the task
- Micro-fracturing due to improper technique
- Material
quality issues
Solutions:
- Use
slightly lower grit for the final edge
- Increase
edge angle for more durability
- Ensure
proper support during sharpening
- Consider
edge use and match angle accordingly
Uneven Sharpening Results
Possible Causes:
- Uneven
pressure during sharpening
- Stone
not flat
- Improper
technique
- Edge
damage requiring more work in specific areas
Solutions:
- Focus
on consistent pressure along entire edge
- Flatten
stones regularly
- Use
edge guides for consistent angles
- Address
damaged areas before general sharpening
Tools Developing Rust Despite Care
Possible Causes:
- Insufficient
drying after cleaning
- High
humidity storage environment
- Skin
oils causing corrosion
- Contamination
from other materials
Solutions:
- Ensure
thorough drying after each use
- Improve
storage conditions (desiccants, climate control)
- Wear
gloves when handling sensitive tools
- Apply
protective coatings for storage
Expert Tip: If possible, take photos of problem edges under magnification. As you adjust your technique, this creates a reference point for identifying what's working and what isn't.
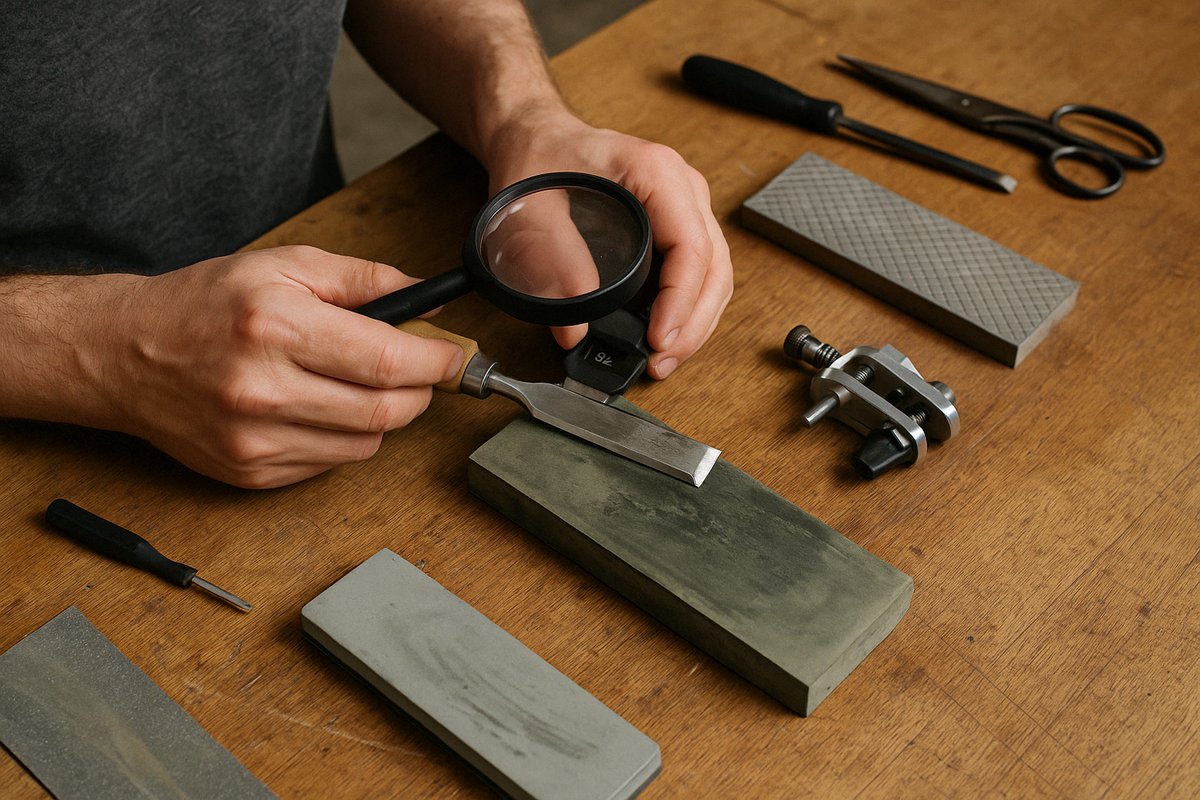
Inspecting blade edges to diagnose sharpening issues.
While home sharpening works for most situations, sometimes
professional services are the better option:
When to Choose Professional Sharpening:
- Expensive
Specialty Tools: High-end woodworking tools, professional shears
- Complex
Geometry: Tools with specialized or compound bevels
- Extensive
Damage: Deep nicks, severe misalignment, or broken tips
- Precision
Requirements: Tools requiring exact tolerances or specialized setups
- Warranty
Considerations: Some warranties require professional maintenance
Finding Quality Professional Sharpening:
1. Research
Options:
- Dedicated
sharpening services
- Mobile
sharpening services at farmers markets or craft fairs
- Industry-specific
professionals (woodworking stores, salon suppliers)
- Tool
manufacturers' authorized service centers
2. Questions
to Ask:
- Do
they specialize in your type of tools?
- What
is their process for testing after sharpening?
- Do
they offer any guarantees on their work?
- What
measures do they take to prevent overheating?
3. Cost
Expectations:
- Basic
household tools: $5-15 per item
- Kitchen
knives: $7-25 per knife
- Woodworking
tools: $8-30 per tool
- Specialty
items: $15-75 depending on complexity
Expert Tip: Develop a relationship with a quality
professional sharpener even if you handle most maintenance yourself. They can
manage complex repairs or major restorations while you handle routine
maintenance.
Professional sharpening in action—precision tools and expert care.
Quality sharpening tools make the process easier and more
effective. Here are my recommended supplies:
Essential Starter Kit:
✏ Sharpening
Stones:
✄ King 1000/6000 Combination
Whetstone - Excellent value for quality
✄ DMT D8C 8" Diamond Whetstone -
Durable and low-maintenance
✏ Guides
and Jigs:
✄ Veritas Mk.II Honing Guide - Premium guide for chisels and plane irons
✄ Lansky Multi-Angle Clamp -
Versatile for most knives
✏ Strops
and Compounds:
✄ Flexcut Slipstrop - Works for flat
and curved tools
✄ Green Honing Compound -
Excellent all-purpose polishing
✏ Maintenance
Items:
✄ Camellia Oil - Food-safe
tool protection
✄ Norton Flattening Stone
- Keeps
waterstones flat
Method-Specific Recommendations:
For Sandpaper Method:
✄ 3M Wetordry Sandpaper Kit - Includes multiple grits
Small
glass panel for backing (picture frame glass works well)
For Stone Sharpening:
✄ Stone Pond - Keeps stones soaking
while in use
✄ Non-slip Stone Holder -
Prevents movement during sharpening
For Power Sharpening:
✄ Work Sharp Ken Onion Edition -
Versatile power sharpening system
✄ Tormek T-8
Water-Cooled System - Premium option for serious tool users
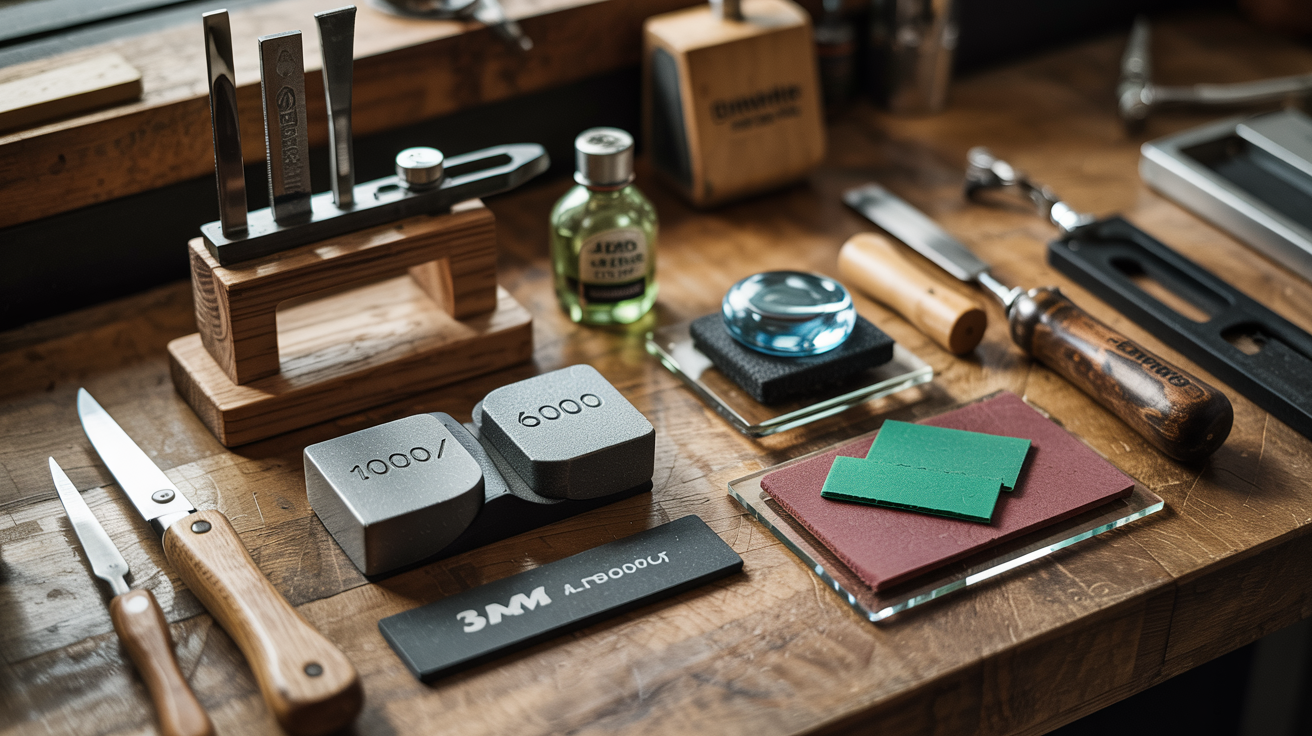
Sharpening essentials ready for use—tools for maintaining razor-sharp edges.
Hi, I'm Josh VT, a retired Army Officer
and Navy contractor whose journey with tools and craftsmanship began at age 10
with my first set of woodcarving knives. That early fascination evolved into a
lifelong passion for building, creating, and mastering the care of tools across
countless projects.
My hands-on experience spans architectural
drafting to service as a carpenter in the Air National Guard. Over the years,
I've tackled full-scale home renovations, re-roofing, tiling over 1,000 square
feet, and building custom closets. I am currently designing and finishing my basement from blueprint to completion.
Through trial and error, I've learned
that properly maintained tools are the foundation of any successful project; I
often tell people this. The techniques in this guide come from decades of
real-world experience—not theory.
I approach tool maintenance with the same
precision I applied as a data analyst and the creativity I bring to my
woodworking projects. I believe in investing in quality tools and learning the
skills to maintain them properly, saving money and frustration in the long run.
When I'm not working on my latest
renovation or sharpening my tool collection, I'm developing content for my blog
at CustomWoodCarving.com and preparing tutorials for my upcoming YouTube
channel.
My goal is simple: whether you're
restoring a vintage chisel or learning to sharpen your first knife, I want to
provide practical knowledge that builds your confidence and brings you the
satisfaction of well-maintained tools and clean, precise cuts.
I'd love to hear about your tool
maintenance experiences and projects! Feel free to contact me at
josh@customwoodcarving.com with any questions or just to share what you're
working on.

Here is the framing, custom soffit, and resilient channel for soundproofing.